Drill Jig
DRILL JIG
Problem
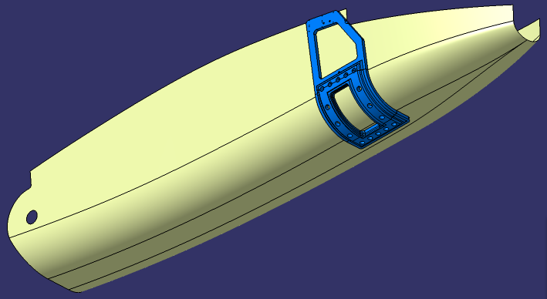
- Tasked with producing small sub assemblies for a single aisle wing. These are then shipped to the wing plant where these smaller sub assemblies are assembled to the wing.
- Part of the sub assembly process, involved manually transferring a hole pattern from drawing dimensions to the opposing outer sub assembly surface then drilling the pattern of using drill motors.
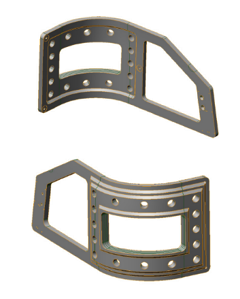
- FDM where tasked with creating light weight re-usable drill jig to enable the transferral of the hole pattern through the outer skin and into the supporting structure.
Solution
- The above jig was designed using Catia V5 from the CAD data supplied. Hole vectors used to give the exact location of the hole pattern as well as a repeatable location for securing the drill jig to the outer skin.
- The jig was then 3D printed using our polyjet machine which can print in 16 micron layers (0.0006”)
- Drill bushes then bonded into place to ensure the correct vector is maintained whilst drilling and also increases the life span of the tool.
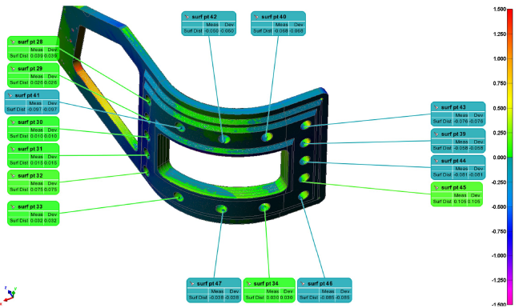
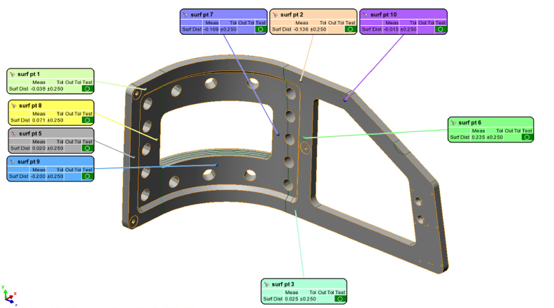
- The tool was then inspected using our 3D scanning equipment to ensure the printed tool matched the CAD data. Inspection reports where created to issue to the customer to verify the data.
- An estimated 2 hour time saving per sub assembly was noted by the customer through using our drill jig as opposed to manually transferring the holes from the drawing.

